 +
CertFusion
+
CertFusion
How to Send Certificates with ChatGPT
Enable Developer mode in ChatGPT's settings, add CertFusion as a custom plugin using the MCP server
URL https://certfusion.com/mcp, authorize it with
OAuth, then ask in plain English — for example, "add David to the Online Webinar list, then issue
the certificate." ChatGPT handles the rest through CertFusion's tools.
Watch: Developer mode to issued certificate in under three minutes
Step-by-step guide
Certificate admin is repetitive by design: export a list, upload it, click issue, repeat. With CertFusion's MCP server, you can hand that entire loop to ChatGPT and run it from a chat window. In this guide you'll connect the two, then add a recipient, issue a real certificate, and check your quota — using nothing but prompts.
Prerequisites
You'll need a CertFusion account with at least one certificate template (new to CertFusion? See the knowledge base for creating your first design), a ChatGPT account with plugin support, and about five minutes.
Step 1: Open ChatGPT's Settings
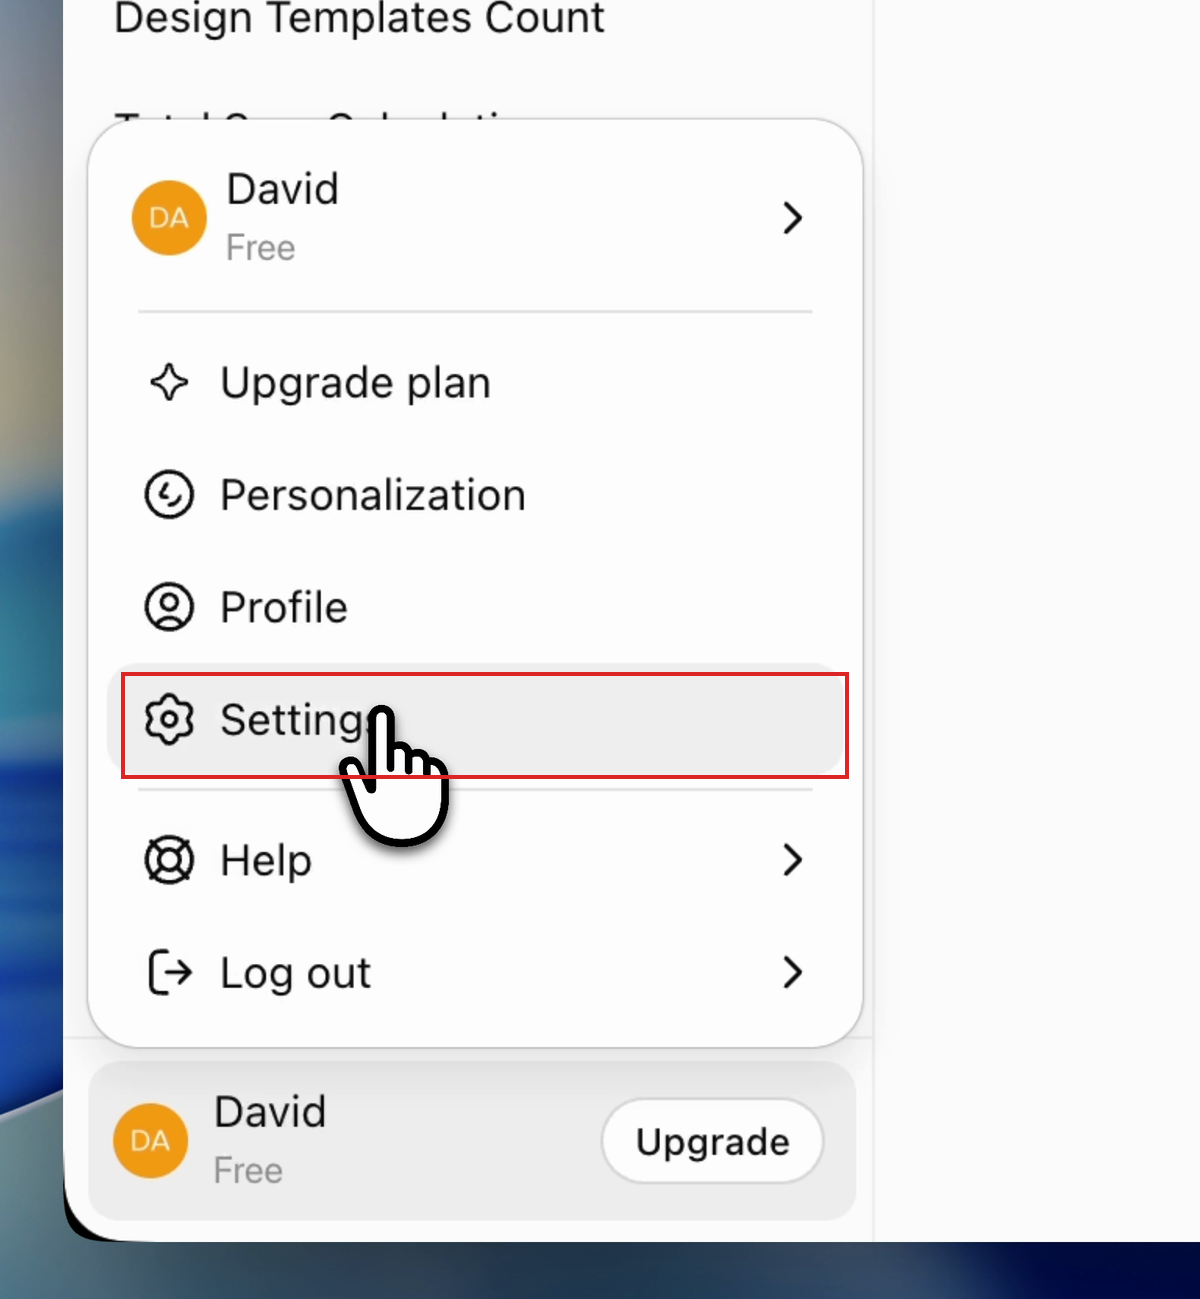
In ChatGPT, click your profile at the bottom left and choose Settings.
Step 2: Enable Developer Mode
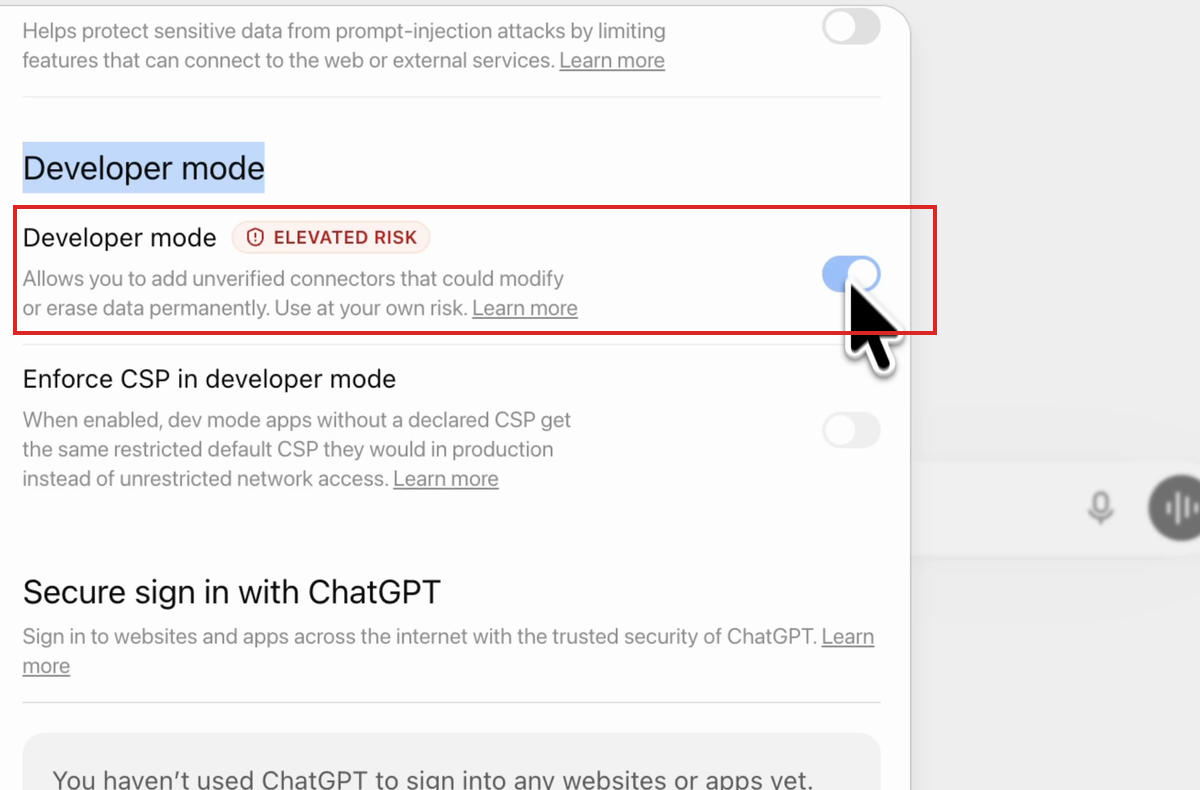
Custom MCP plugins require Developer mode. In the settings sidebar, open Security and login, scroll to the Developer mode section, and switch the toggle on. ChatGPT flags it as "elevated risk" because it lets you add unverified connectors — that's exactly what we need for a custom MCP server.
Step 3: Browse Plugins
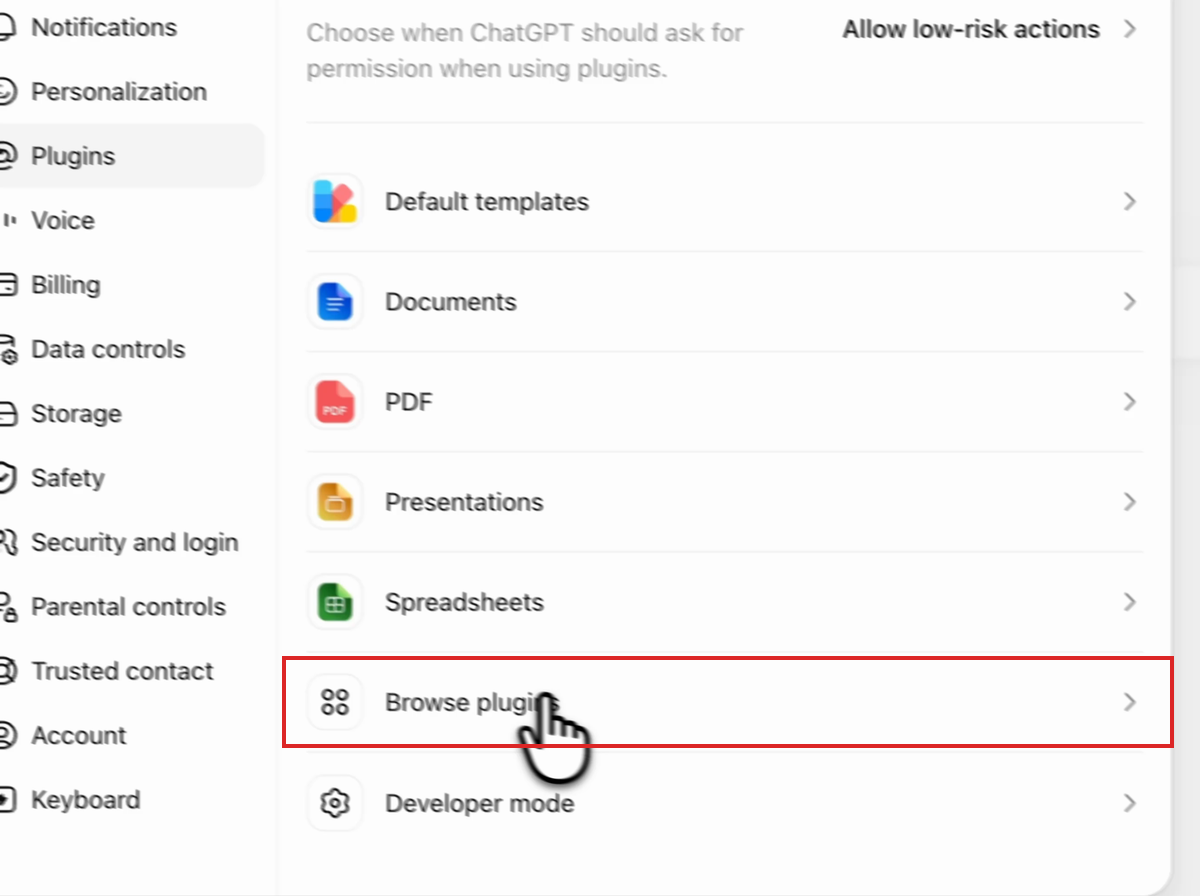
Head back to the Plugins tab and click Browse plugins.
Step 4: Create the CertFusion Plugin
Click the plus button to create a new plugin. Name it CertFusionMCP, set the Connection to Server URL, and enter:
https://certfusion.com/mcpUnder Authentication, choose OAuth — CertFusion handles the rest for you.
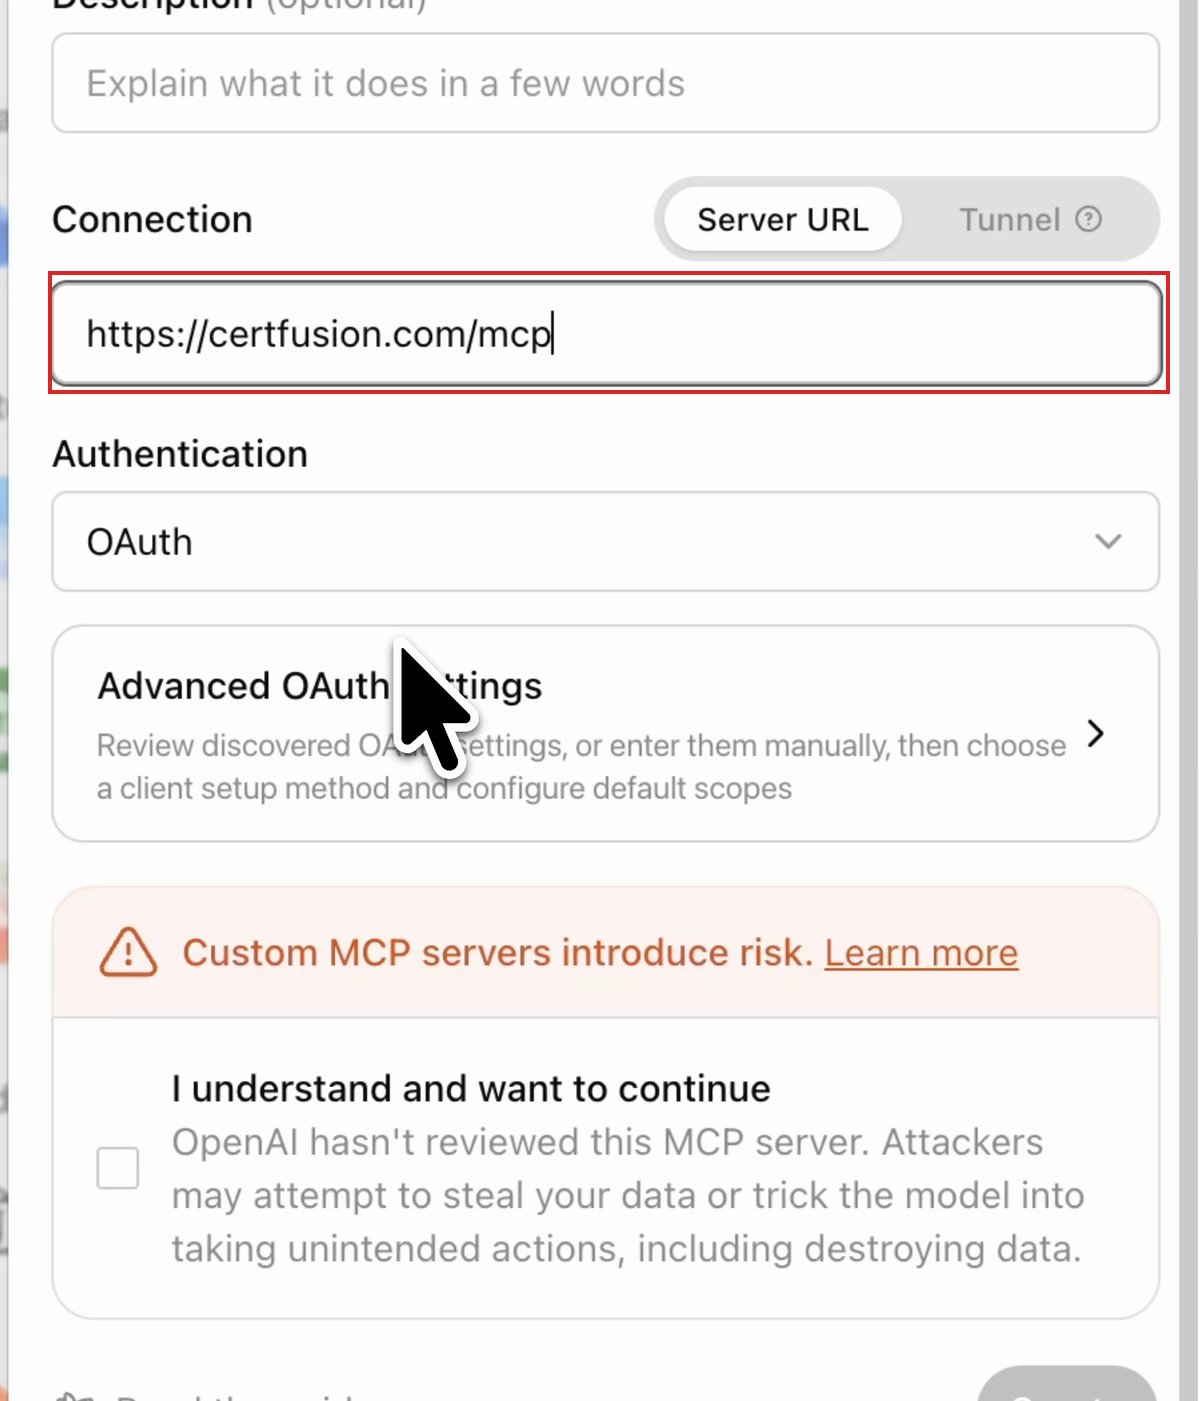
Tick "I understand and want to continue" under the risk notice, then click Create.
Step 5: Authorize with OAuth
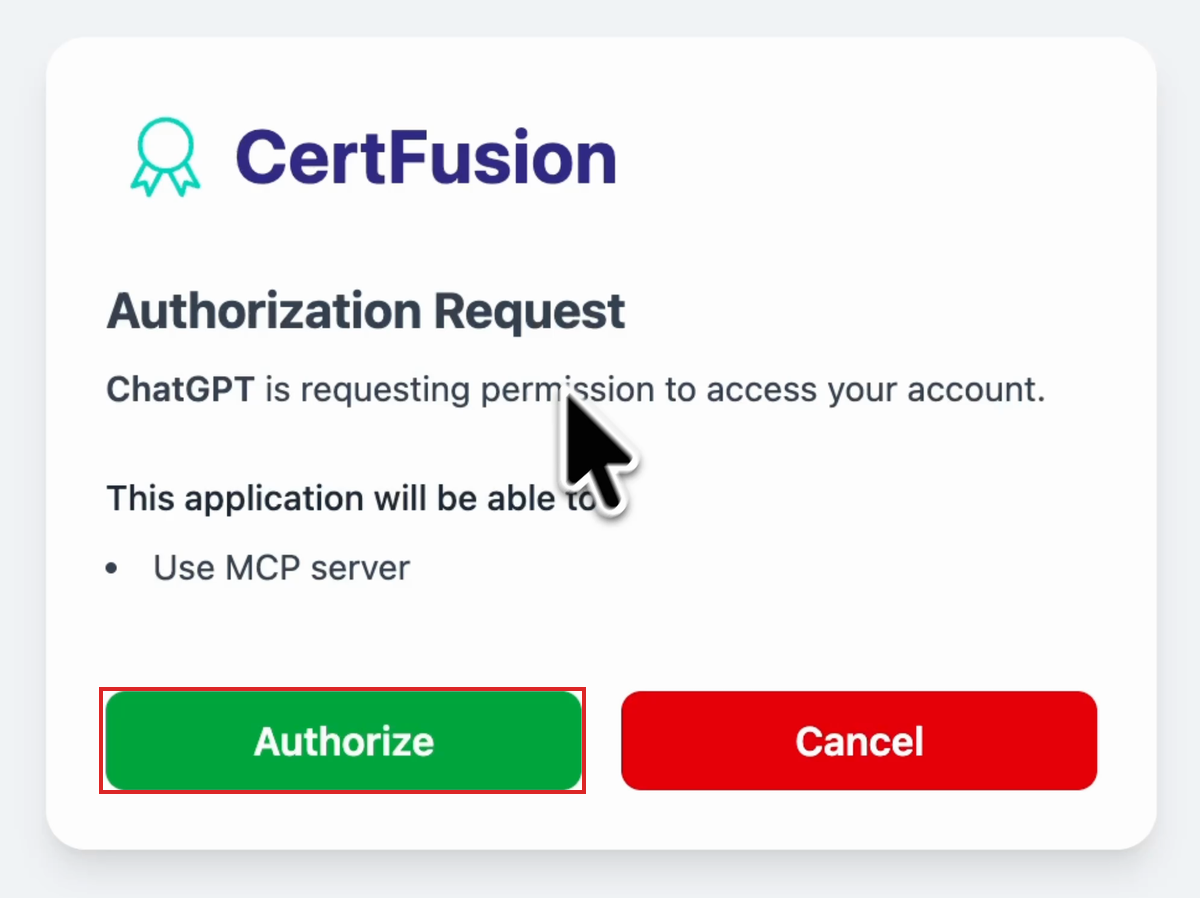
ChatGPT opens CertFusion's secure authorization page. Click Authorize to grant access to your account. Access is scoped to your own designs, lists, and recipients.
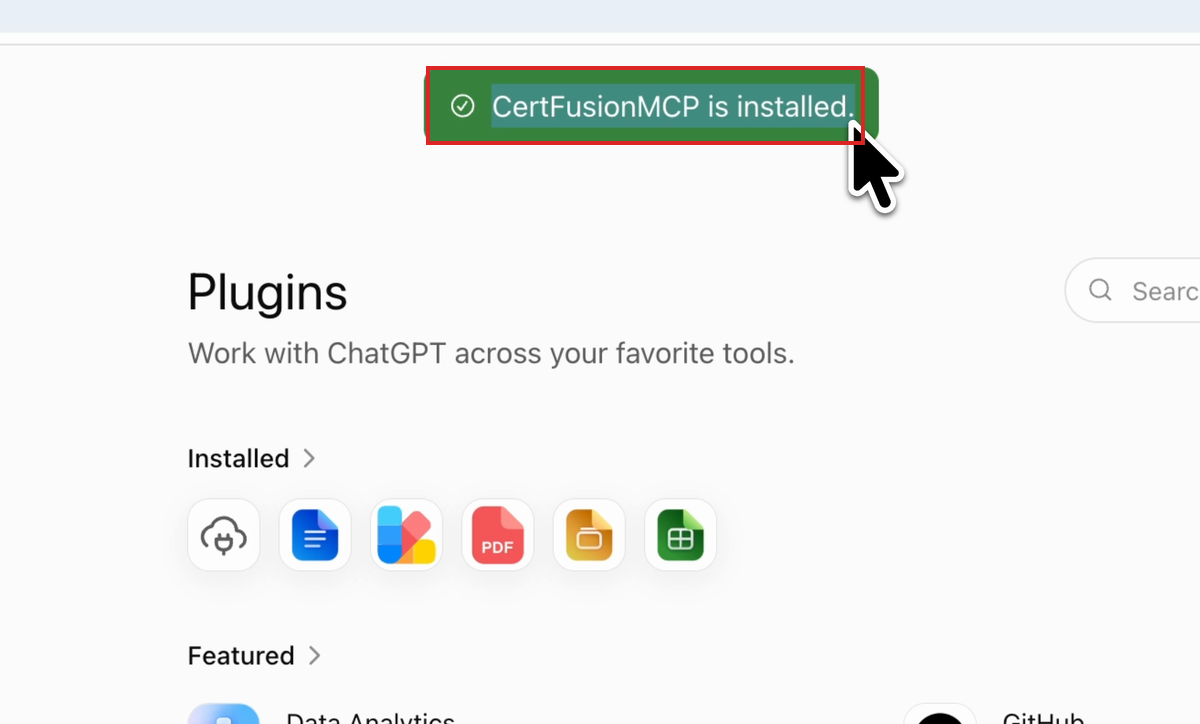
A moment later you're back in ChatGPT with a confirmation toast: CertFusionMCP is installed.
Step 6: Ask ChatGPT About Your Templates
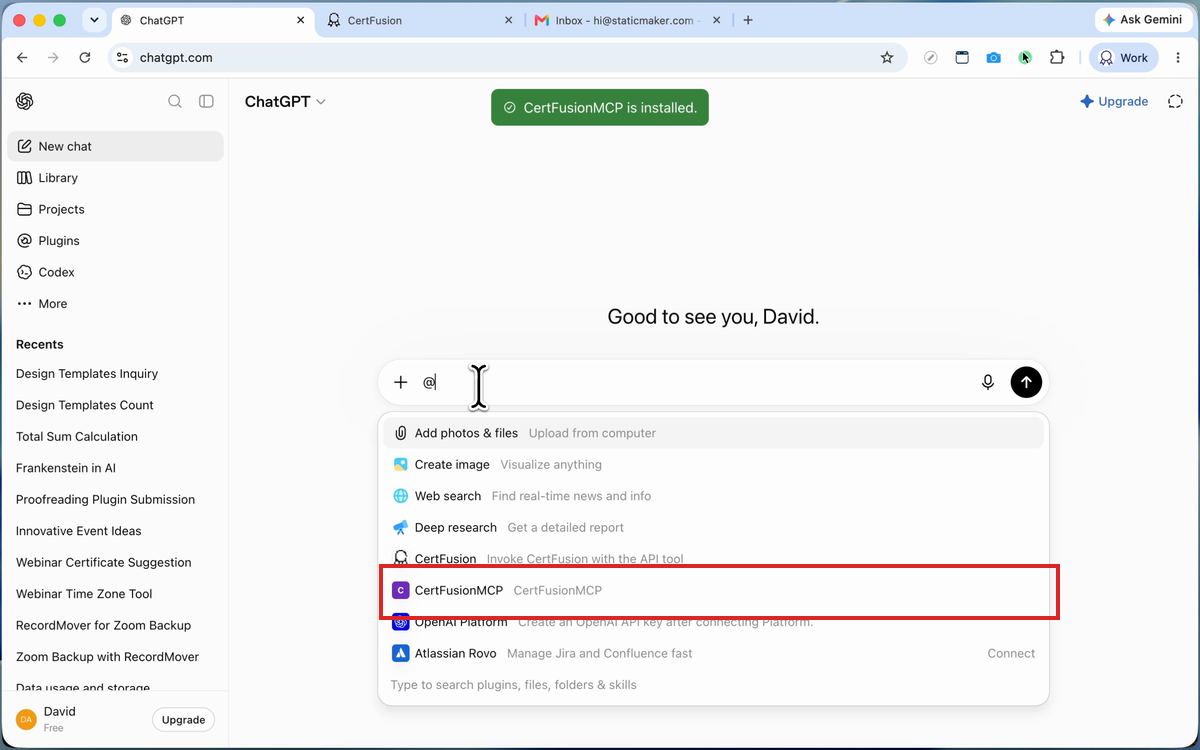
Start a new chat, type @ or + to bring up the tools menu, and tag CertFusionMCP so ChatGPT uses the plugin.
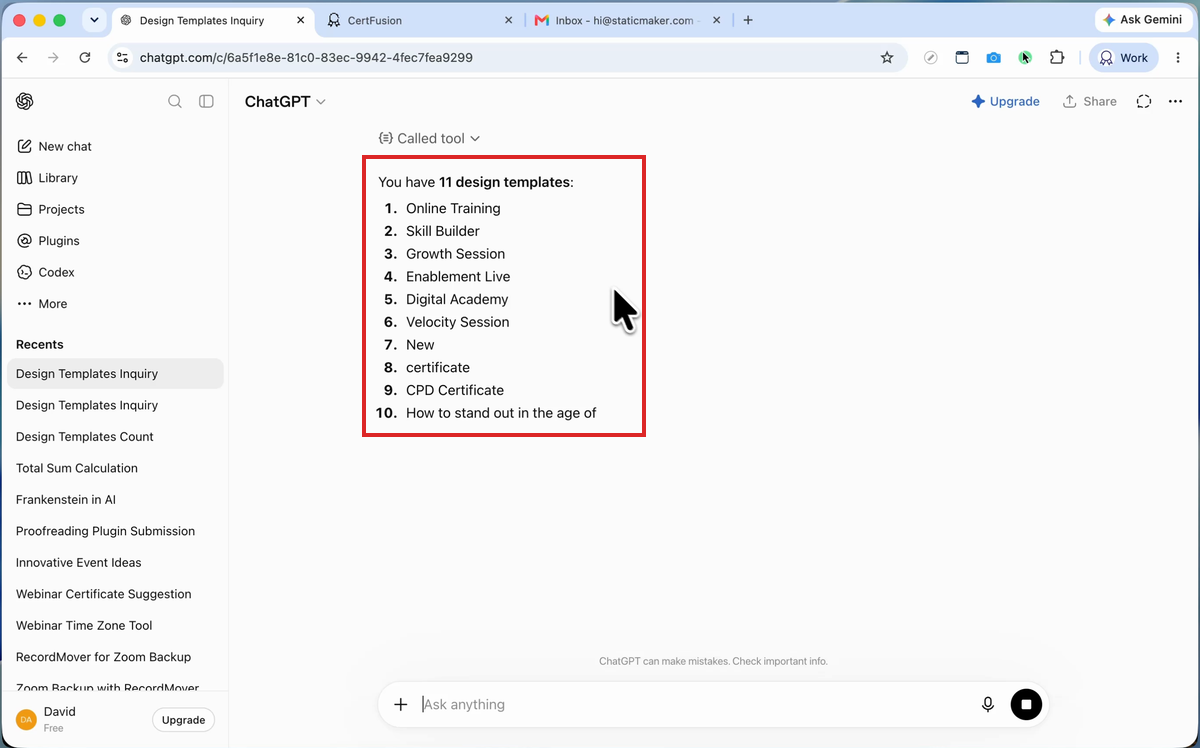
Try a read-only question first: "what design templates do I have?" ChatGPT calls the CertFusion tool and answers with live account data — in this case, 11 templates.
Step 7: Add a Recipient in Plain English
Now the real workflow. Type a prompt like:
add David/hi@staticmaker.com to the "Online Webinar" list.No forms, no CSV uploads.
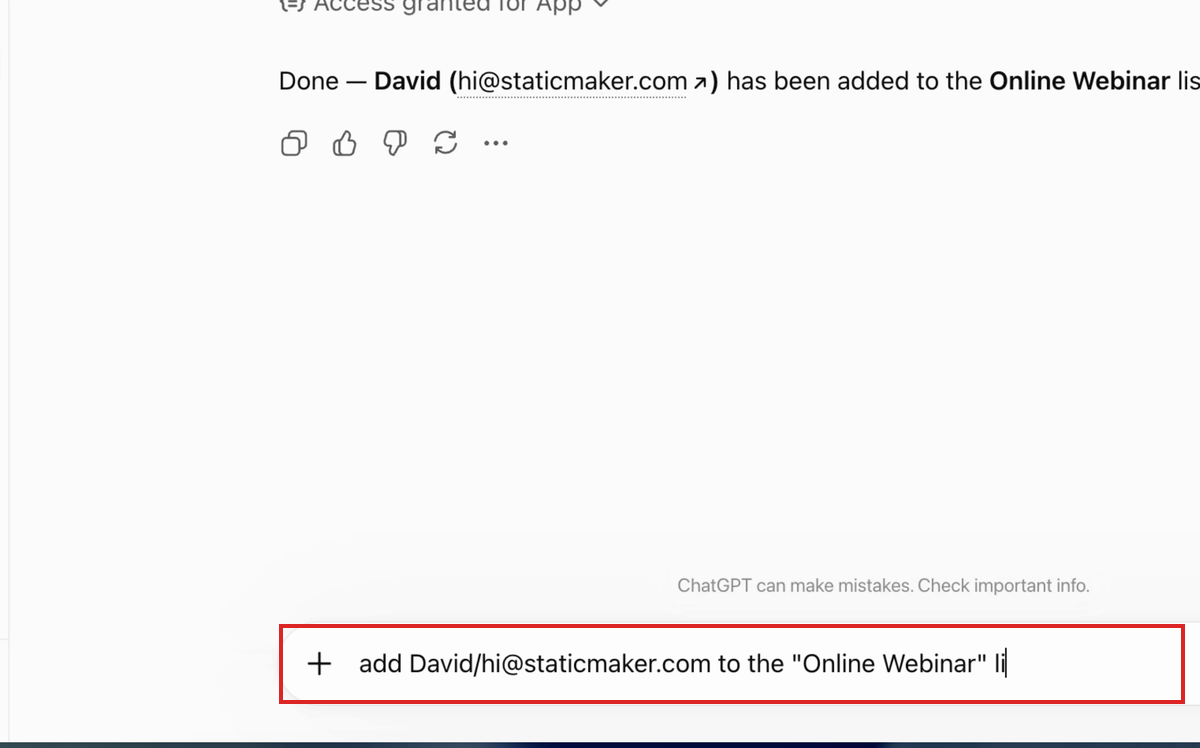
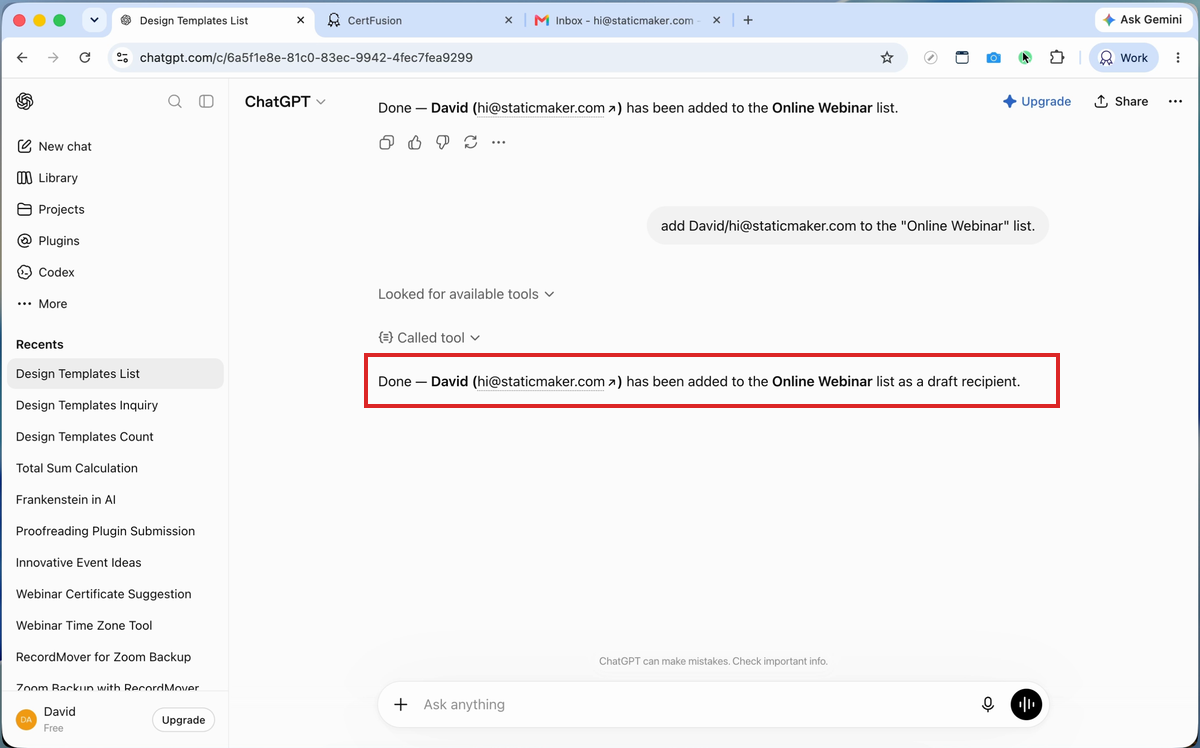
ChatGPT calls the tool and adds David to the list as a draft recipient.
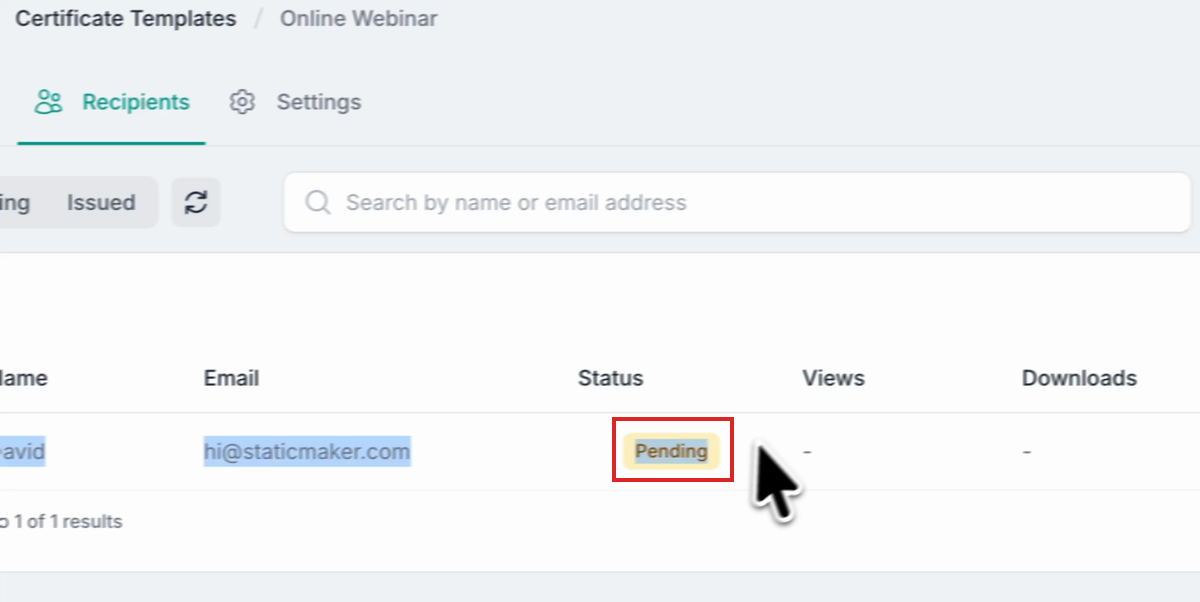
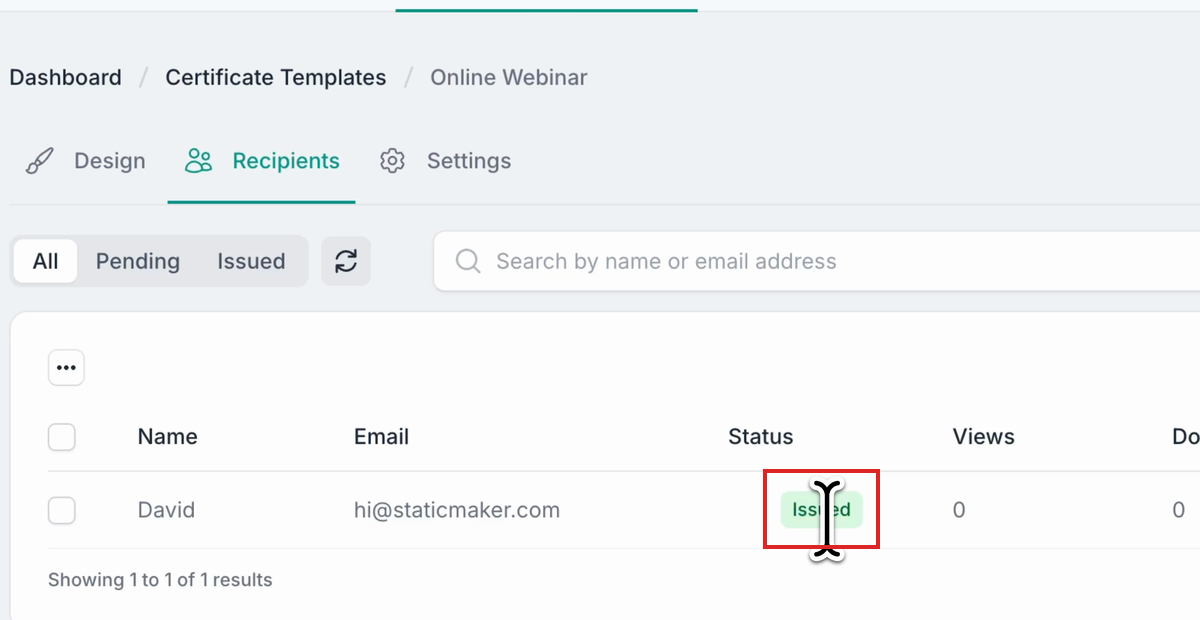
You can verify in the CertFusion dashboard — the recipient appears under the template's Recipients tab with a Pending status.
Step 8: Issue the Certificate with One Reply
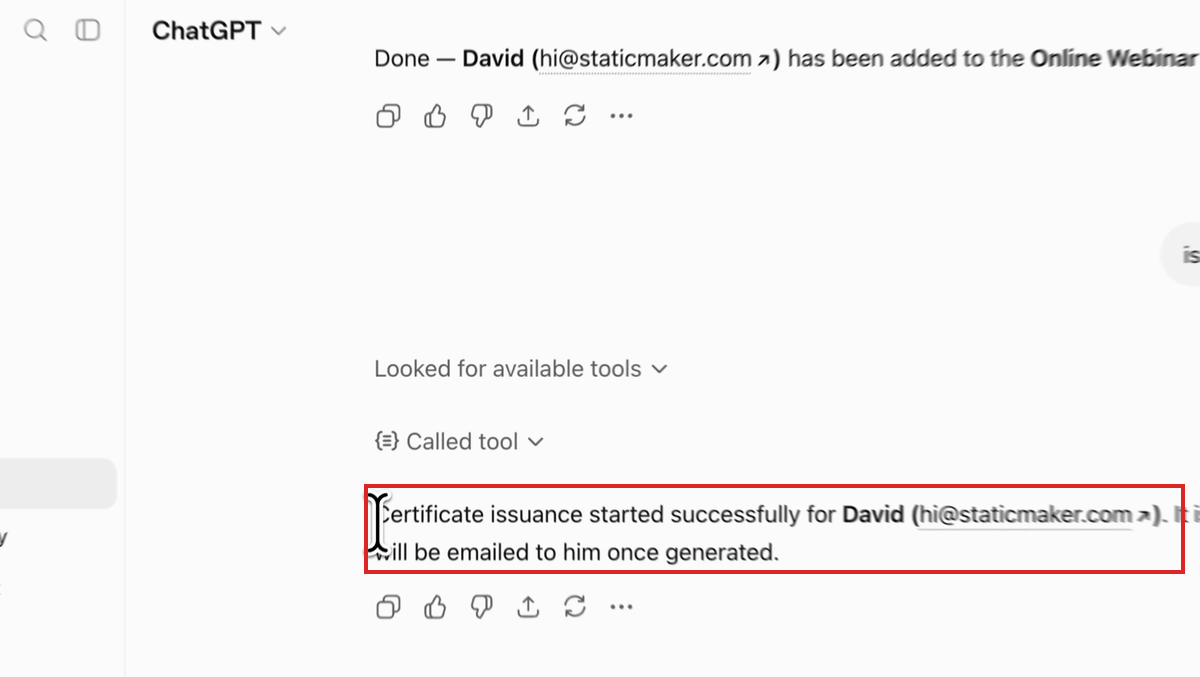
Reply: "issue the certificate to him." ChatGPT starts the issuance — the certificate is generated and emailed to the recipient automatically.
Refresh the dashboard and the status flips from Pending to Issued.
Step 9: The Recipient Gets a Verified Certificate
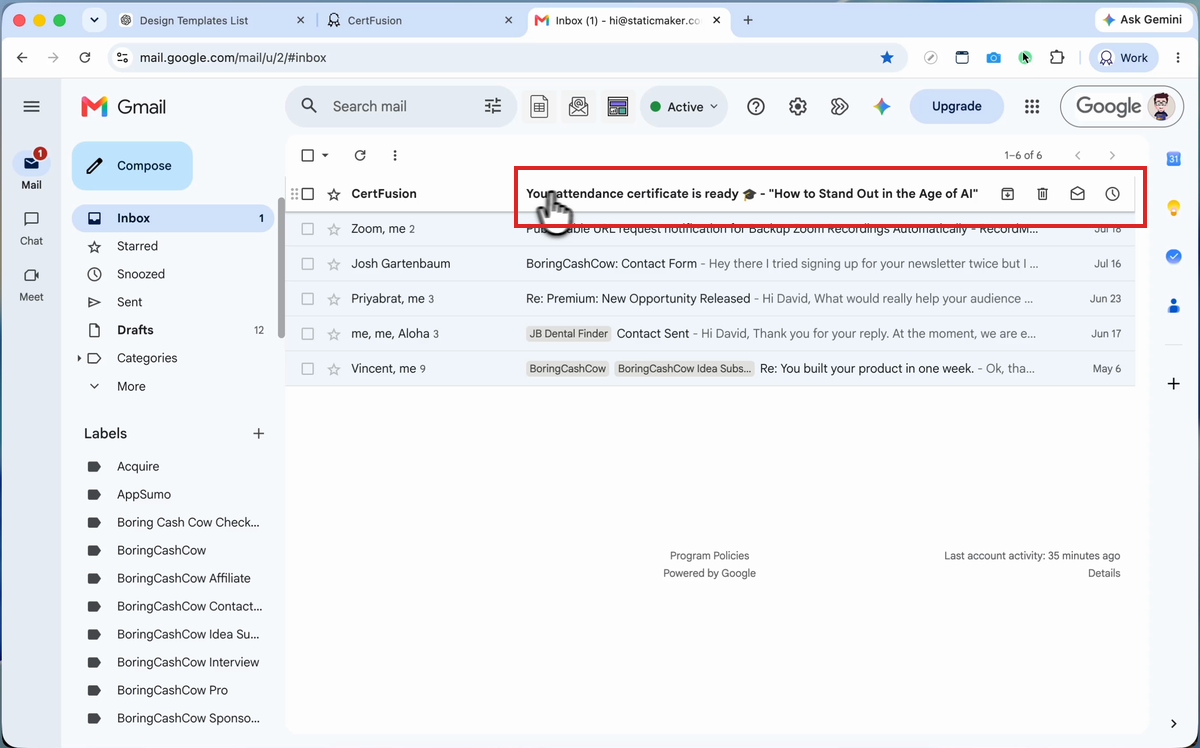
The email lands within moments.
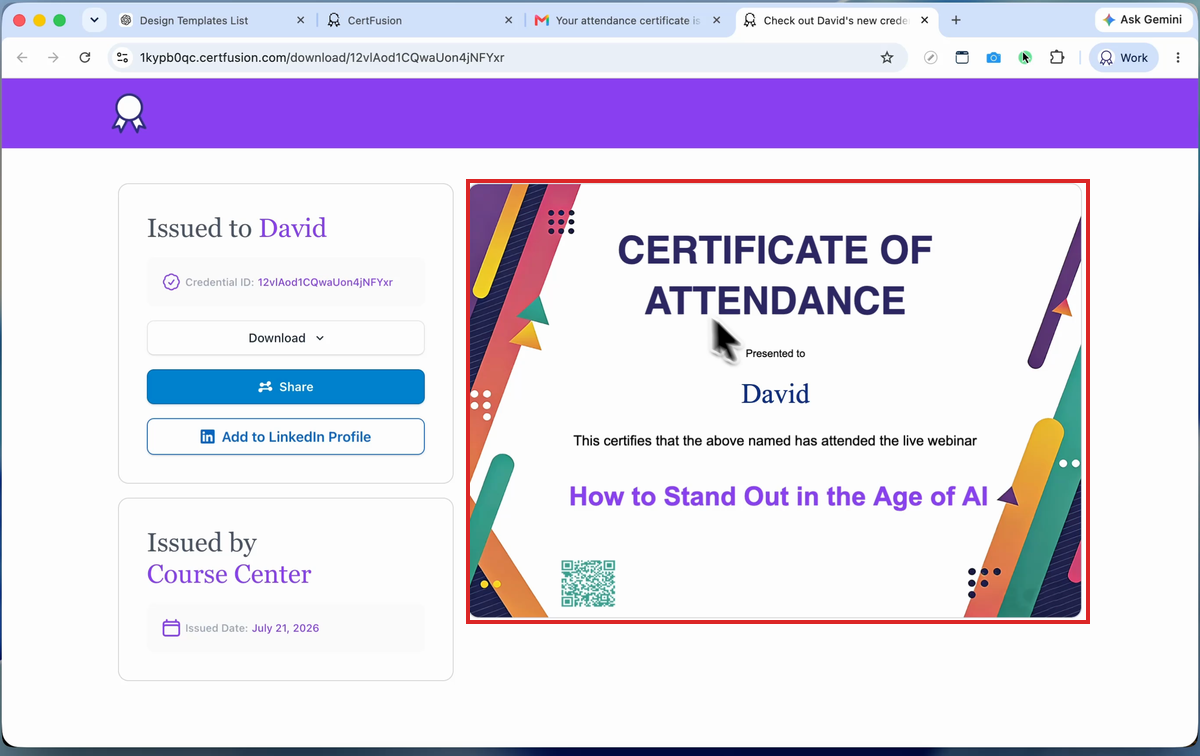
The certificate page gives the recipient a download, a share button, an Add to LinkedIn option, and a QR code for verification.
Bonus: Check Your Quota from Chat
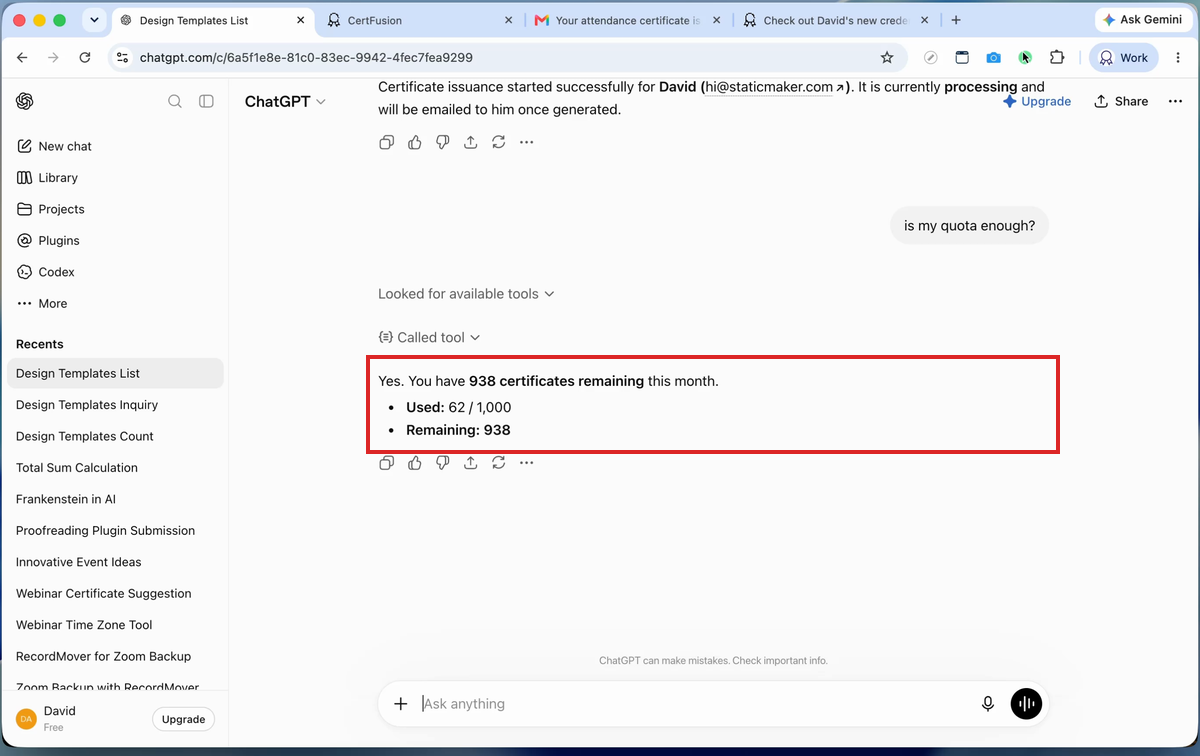
Ask "is my quota enough?" — ChatGPT calls the quota tool and reports your live usage: 62 of 1,000 monthly certificates used, 938 remaining.
FAQ
What is the CertFusion MCP server?
It's a remote Model Context Protocol endpoint (https://certfusion.com/mcp) that
exposes CertFusion's certificate tools — listing templates, adding recipients, issuing
certificates, and checking quota — to AI assistants like ChatGPT.
Why does ChatGPT need Developer mode for this?
Custom MCP plugins are treated as unverified connectors, so ChatGPT gates them behind the Developer mode toggle in Security and login. Turning it on simply unlocks the option to add your own servers, like CertFusion's.
Is it safe to let ChatGPT issue certificates?
Access is scoped to your account via OAuth, and ChatGPT asks permission before running plugin actions. Recipients are created as drafts, so nothing is issued without your say-so.
Can I add recipients in bulk with ChatGPT?
Yes — the MCP server includes a bulk recipient tool, so you can paste a list of names and emails into chat, or combine it with CertFusion's CSV import for large cohorts.
Does this work with Claude or other AI assistants?
The MCP server works with any MCP-compatible client. This guide uses ChatGPT; Claude supports the same server natively via custom connectors — see our Claude AI MCP guide.
Does issuing via ChatGPT use my normal quota?
Yes — certificates issued through the MCP count against the same monthly quota as ones issued from the dashboard, and you can check the balance any time by asking ChatGPT.
Using Claude instead? Read how to send certificates with Claude AI, or see all AI assistants that work with CertFusion.
Need help? Reach us from our support page.